Managing Content
In this section, we’ll cover the basics of how to manage the pages and posts that make up your site: from creating them to deleting them to making copies.
Description of Post Fields
While there are some differences between posts and pages, they share many of the same fields and properties in the editor.
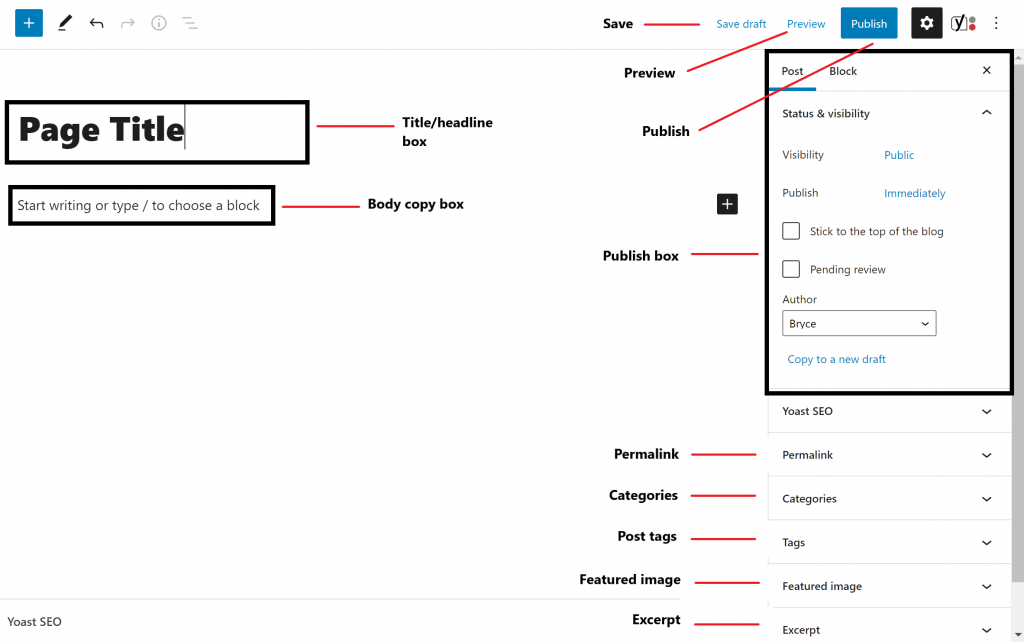
Title/Headline Box
The title of your post. You can use any phrases, words or characters. Avoid using the same title twice as that will cause problems. You can use commas, apostrophes, quotes, hyphens/dashes and other typical symbols in the post like “My Site – Here’s Lookin’ at You, Kid”. WordPress will then clean it up to generate a user-friendly and URL-valid name of the post (also called the post slug) to compose the permalink for the post.
Body copy box
The blank box where you enter your text, links, links to images, and blocks. See our block catalog for detailed examples.
Preview button
Allows you to preview the post before officially publishing it.
Publish box
Contains buttons that control the state of your post. The main states are Published, Pending Review and Draft.
- The Published status means the post has been published live on your site for all to see.
- Pending Review means the draft is waiting for review by an editor prior to publication. In order to designate a page as Pending Review, the editor must check the Pending Review box and then click the Save Draft button.
- Draft means the post has not been published and remains a draft.
Scheduling a post for future publication
To schedule a post for publication on a future time or date, click the date in the Publish area. Change the settings to the desired time and date. Click the “Publish” button, and the post will be published at the desired time and date.
You can also change the publish date to a date in the past to back-date posts.
Permalink
Permalink is a portmanteau for “permanent link”. The permalink is a user-friendly URL derived from the post title and parent page. You can edit the permalink (aka the “slug”) by locating the Permalink section in the Page settings in the editor interface.
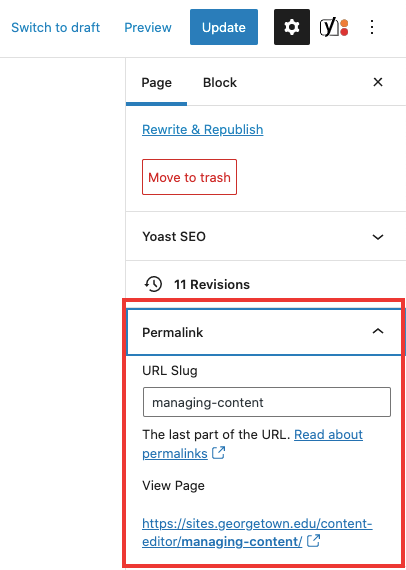
Punctuation such as commas, quotes, apostrophes, and invalid URL characters are removed and spaces are substituted with dashes to separate each word. If your title is “My Site – Here’s Lookin’ at You, Kid”, it will be cleaned up to create the slug “my-site-heres-lookin-at-you-kid”. You can manually change this, maybe shortening it to “my-site-lookin-at-you-kid”.
Save Draft
Allows you to save your post as a draft / pending review rather than immediately publishing it. To return to your drafts later, visit Posts > All Posts in the menu bar, then select your post from the list.
Publish
Publishes your post on the site. You can edit the time when the post is published by clicking the date next to Publish and specifying the time you want the post to be published.
Categories
The general topic that a post or page can be classified in. Readers can browse specific categories to see all posts/pages in the category. To add a new category, click the “+Add New Category” link in this section. You can manage your categories by hovering over Posts in the admin area, then going to Categories.
Post Tags
Posts with similar tags are linked together when a user clicks one of the tags. Add new tags to the post by typing the tag into the box and clicking “Add”. A post should have no more than 5 tags.
Featured Image
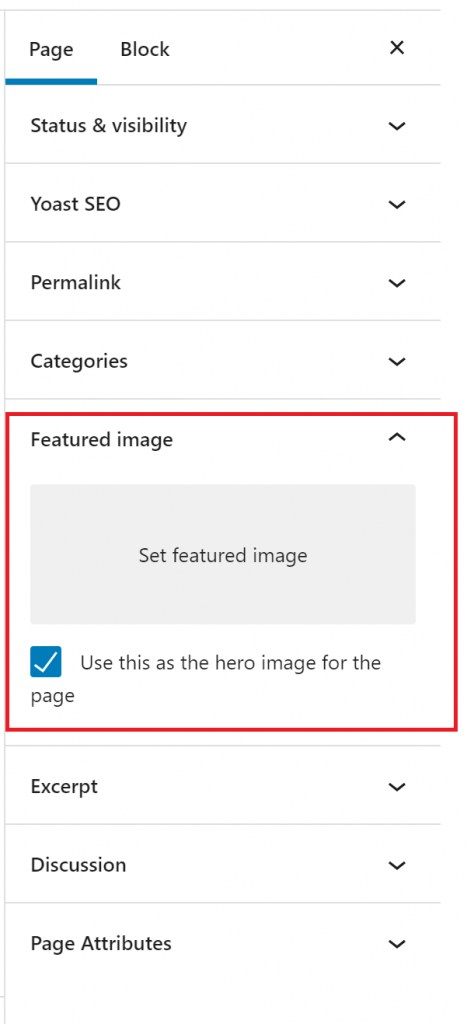
The Featured Image will appear at the top of your page or post, as and can be included along with the Excerpt when your post is pulled into another page via News. The Featured Image will also be displayed on the category, archives, and search pages.
If you would like to use the Featured Image as the thumbnail on other pages, but would not like it to be the hero image on the page itself, uncheck the box labeled “Use this as the hero image for this page”.
You can visit other sections of the documentation for more information on finding images to use and best practices for selecting featured images.
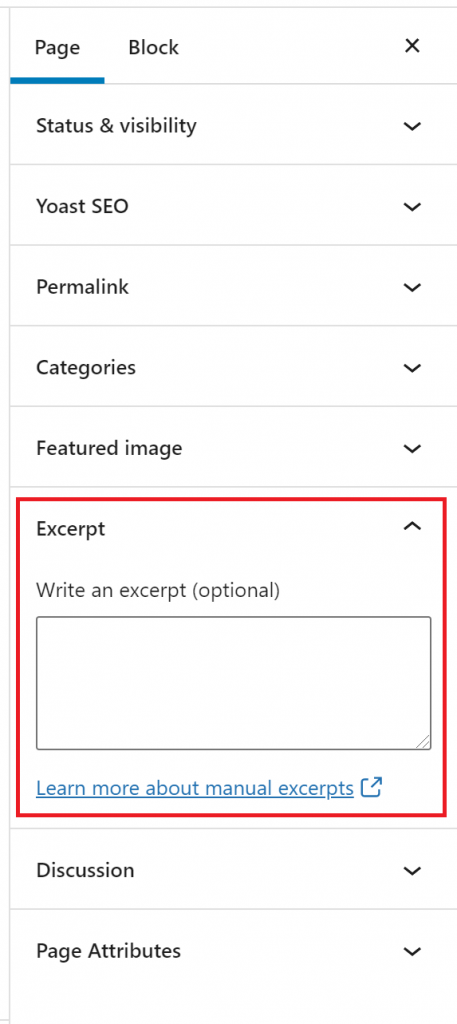
Excerpt
A summary or brief teaser of your page or post that is displayed when the page or post is included in a News block as well as on archive pages. The excerpt can be manually edited in the page sidebar, otherwise an automatic excerpt is generated based on the page or post content.
Page Attributes
These fields apply to pages, but not to posts.
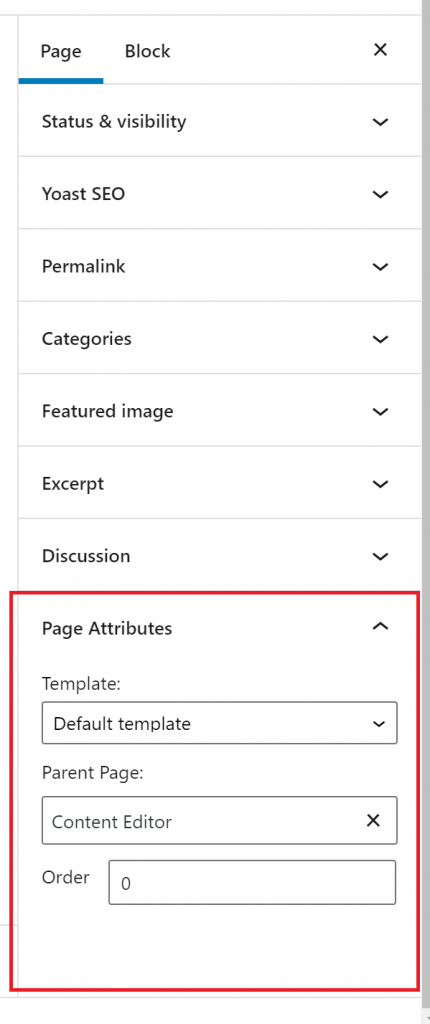
Templates
This section allows you to change the page type, which provide different options for displaying the page content.
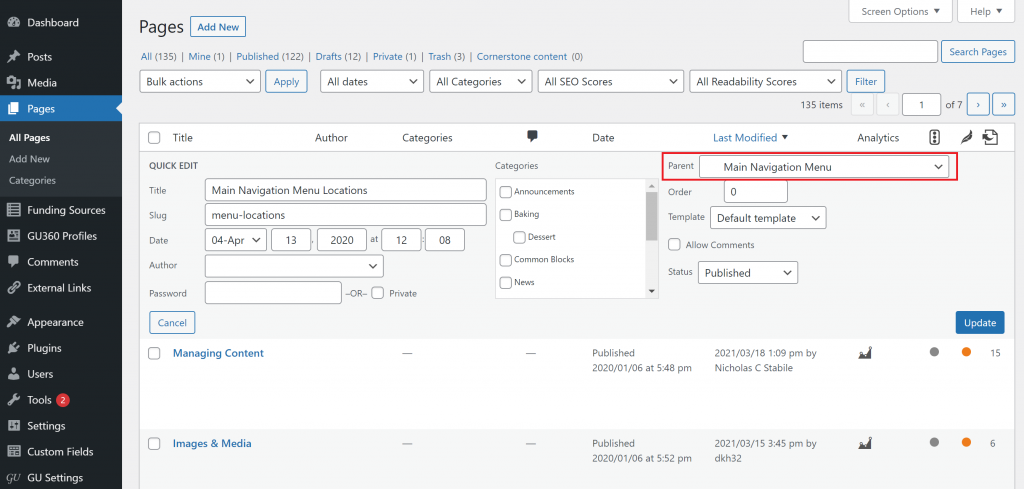
Parent Page
Setting the parent page adds the parent page’s URL slug (as well as the parent’s parent page URL slug, and so on) to the full URL of the current page. For example, the full URL for the Creating new content page is https://sites.georgetown.edu/content-editor/managing-content/creating/. As you can see, the URL slug for that page (/creating/) comes last, preceded by the parent page URL slug (/managing-content/), and the previous parent page URL slug in this lineage (/content-editor/).
Setting parent pages is not required, but it is helpful to match the parent page structure to the menu structure so users can rely on both of these options to help them understand the relationship between the pages on your site.
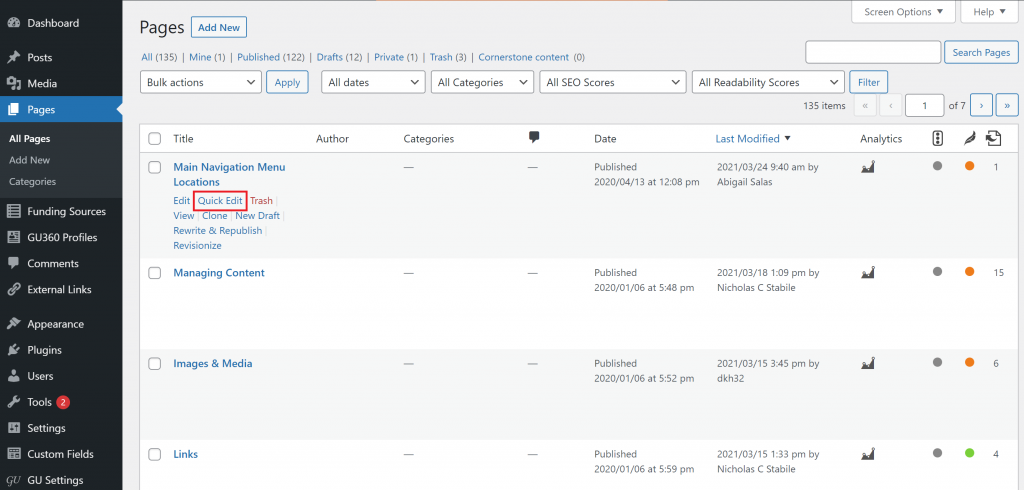
You can also edit or add a parent page using the “Quick Edit” feature when you are in the “All Pages” view in the editor.