Adding the Block
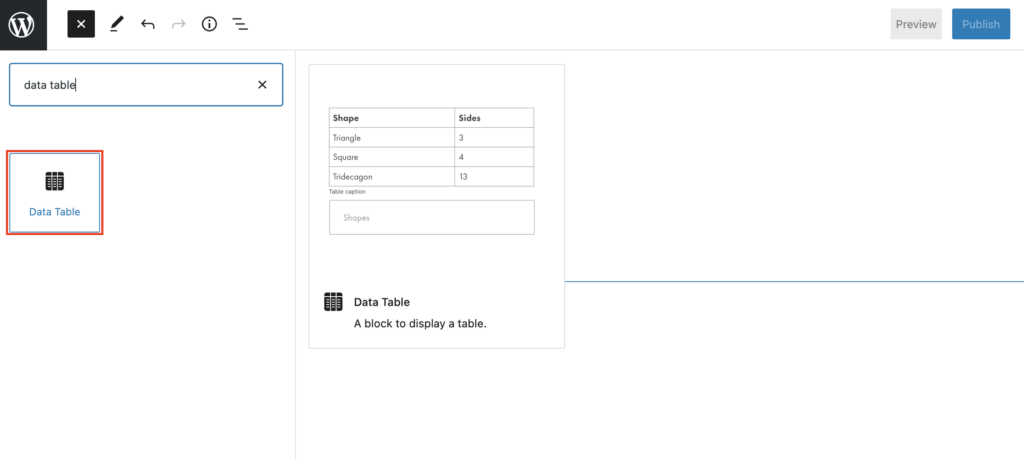
To add the Data Table block, click the “+” symbol and search for “Data Table”. Then, select the Data Table block icon.
Editing a Data Table
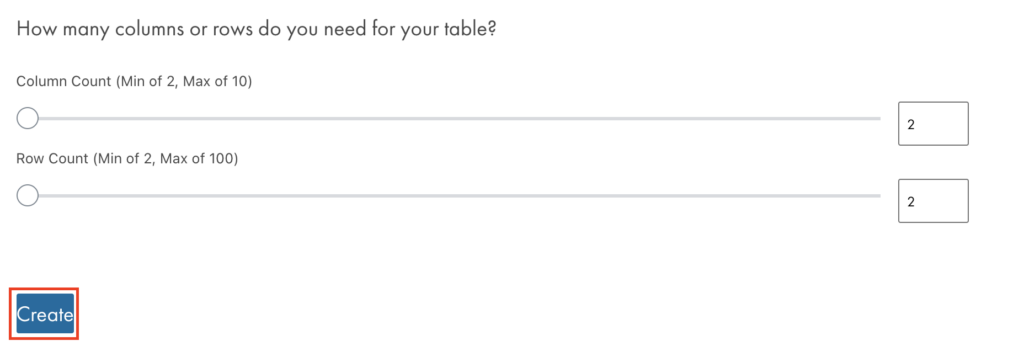
Upon adding the block, you will be asked to specify the number of columns and rows the table will have. You can do this by moving the slider or by typing the number in the text field. You can add between 2-10 columns and 2-100 rows per table. Once the desired number of columns and rows have been selected, click the “Create” button.
Once you have the blank table you can begin to add content by clicking on the desired cell and typing.
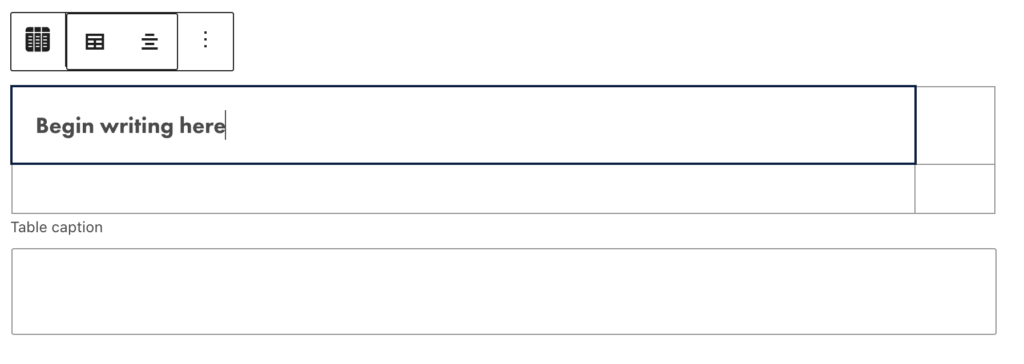
You can add a table caption that will display below the data table and describe its contents in the “Table caption” field. This is especially important if you have more than one table on a page. The table caption can be especially helpful for users who utilize screen readers to navigate your website.
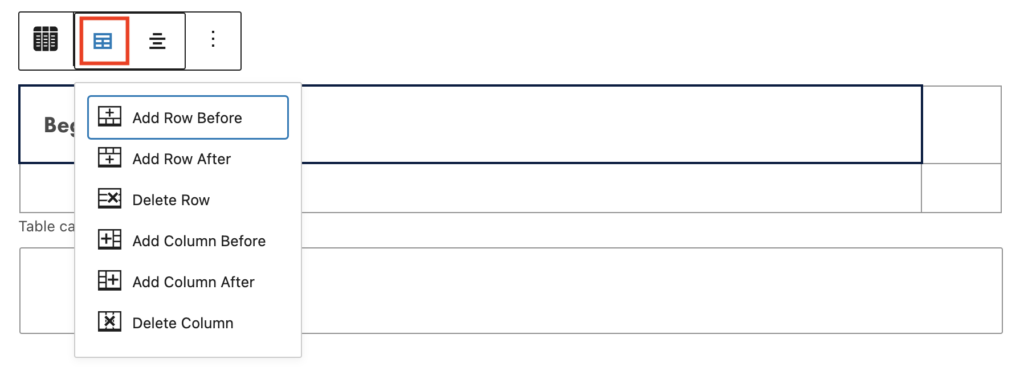
To add or delete rows or columns from the table, click the table operations icon in the upper left corner.
Additional Block Settings
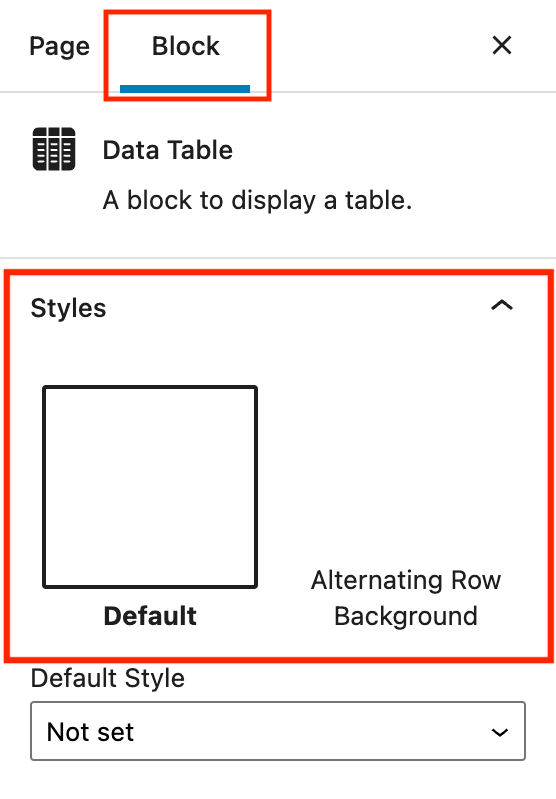
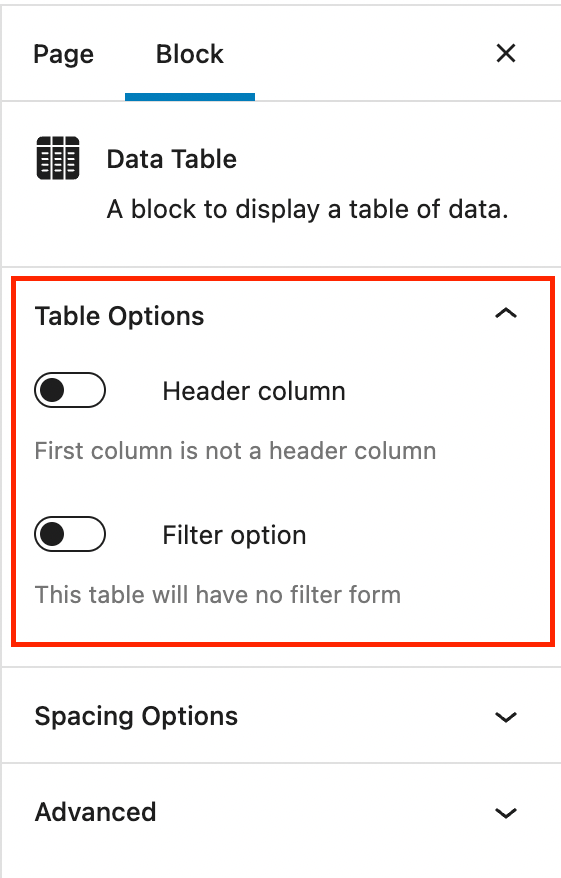
In the block tab of the inspector panel, you can find options to change the block style, create a header column, and create a filterable table.
There are two style options for a data table block: Default, which features an all-white background, and Alternating Row Background, which features alternating white and gray backgrounds.
Options for a header column and filterable table can be found under the Table Options section.
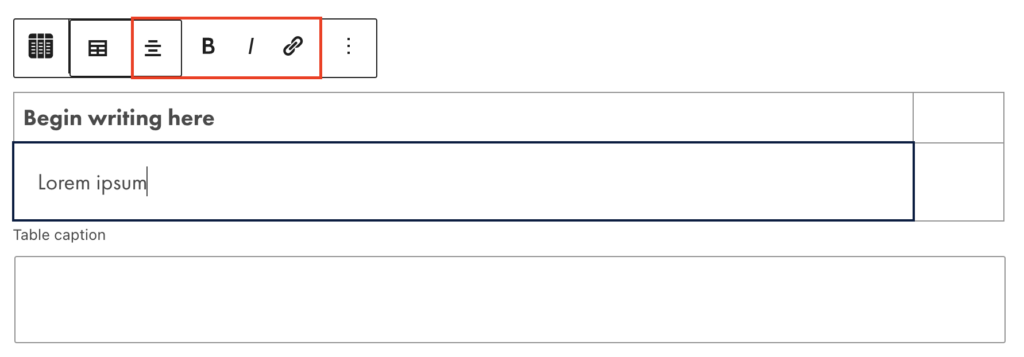
In the block toolbar, there are options to center align, bold, italicize, or link the text in cells.
