Navigating the WordPress Dashboard
After logging in to your website, you’ll be taken to your WordPress Dashboard. From here, you’ll be able to perform all the necessary editing functions. The following image shows what you’ll see on your Dashboard with each aspect labeled and described below.

- GU Announcements. This text box is maintained by Web Services and includes some helpful links that are relevant for website editors.
- Add New shortcut. This quick dropdown option from which you can add a post, media, page, external link, or user.
- Site title. The site title is displayed at the top of the admin bar. While on the dashboard or viewing the editor, clicking the title will take you to the front-end of the website. While on the front-end of the website, clicking this option will take you to the dashboard.
- My Sites. Hovering over this option provides a dropdown of all the GU WordPress sites you have access to, which allows you to easily navigate back and forth between them.
- Posts. From this option, you can view all posts, add a new post or manage your categories and tags.
- Media. You can view all images and media, edit images, as well as add new images.
- Pages. From here, you can view all pages or add a new page.
- External Links. From here, you can view and add external links.
- Appearance. Under this option, you can view and edit the menus on your site.
- Users. Site managers can view, edit, add, and remove users from their site here. All other user roles will not see this option in the dashboard.
- Tools. This option is empty for GU WordPress site users as only Web Services has access to these options.
- GU Settings. These are site-specific settings that can be altered, including editing the footer.
Access and Roles
In order to be able to edit your Web Services-managed website, you’ll need to first request access and be approved by the current point of contact for the website.
When you are given access, you’ll be assigned one of the various user roles available. Each of these roles has different permissions and capabilities, but the standard role is Editor.
Once you’re all set with your access and assigned role, you can log in to edit your website and start exploring the admin area.
Gaining Access
To be granted access to edit a Web Services-managed website, you can follow either of these two steps:
- Contact a Site Manager for your website. The Site Manager role is typically granted to 1-2 people and has the ability to add and remove other users. Large sites with many editors that have a dedicated website editor are more likely to have a Site Manager. If you do not know the Site Manager(s) for your website or your website does not have one, follow the next option.
- Email the Web Services team. When in doubt, you’re always welcome to email webservices@georgetown.edu and we can give you permission to edit your website. When emailing our team, it’s helpful to include the following information:
- List of NetID’s for users who need access.
- Name and URL of the site you need access for.
- Copy the existing main point of contact for your website or let us know why you need access. If you don’t know the main point of contact, we’ll reach out to the person we have listed in our records to confirm your access request.
How to Login
Logging in
To log into a site, go to the site’s homepage and add “/login” to the end of the URL, following this format: [sitename].georgetown.edu/login
This will bring you to a login page.
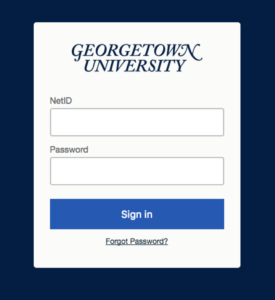
Enter your NetID and password when prompted. After logging in, the dashboard for the site will appear.
Logging out
To log out of a WordPress account, hover over the profile icon in the top right of the page. This will open a profile menu.
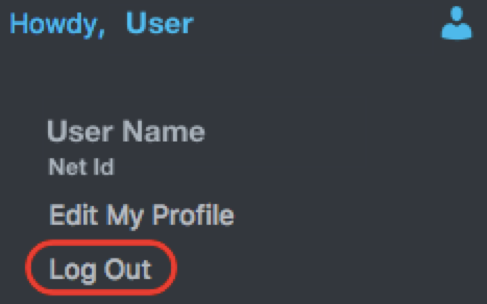
Click “Log Out”. Closeout of the browser to fully log out.
User Roles
User roles determine the access level or permissions of a person authorized (invited by an Administrator) to use a GU WordPress site.
Each user role is capable of everything that a less powerful role is capable of. In other words, Editors can do everything Authors can do, Authors can do everything Contributors can do, and so on.
The roles are listed here from least powerful to most powerful. Please contact webservices@georgetown.edu if you have additional questions about user roles.
Contributor
- Create and edit only their own posts and pages.
- Cannot publish pages or posts.
- When a Contributor’s post or page is ready to be published, the Contributor must notify an Editor or Site Manager to review it.
- Once a Contributor’s post or page is approved and published, it can no longer be edited by the Contributor.
- Contributors do not have the ability to upload files or images, but they can see the site’s stats.
Author
- Create, edit, publish, and delete only their own posts and pages.
- Upload files and images.
- Authors cannot modify posts or pages by other users.
Editor
- Create, edit, publish, and delete all posts and pages (not just their own).
- Manage categories, tags, and links.
- Update the site footer.
Site Manager
- Considered the primary person(s) of contact for the site. There should only be 1-2 site managers per site.
- Create and edit all posts, pages, categories, tags, and menus.
- Access to site settings page where they can update the site footer.
- Can add and remove users from the site.
Administrator
- Only Web Services has this role.
- Has full power over the site and can do everything related to site administration.
Glossary
For general WordPress terms and definitions, review our Intro to WordPress Terms on our WordPress at Georgetown documentation site.
For terms and definitions relating to the 1789 theme, review our Glossary for 1789 document.