Navigation menus are a feature that allows users to easily move around your site and provide the structure for how content on your site is related.
In 1789, there are three types of menus: the main navigation, the utility menu, and the footer menu.
The main navigation menu is the primary navigational tool for your website and appears at the top of each page.

The utility menu can be used for secondary actions and resources. This menu appears above the main navigation.

The footer menu can be used to point to any other important information.

Creating a Menu
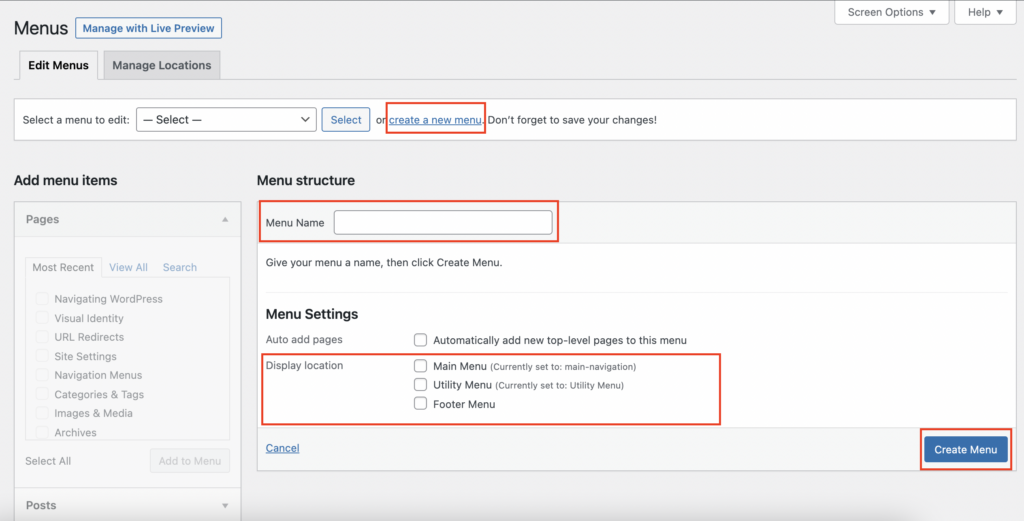
To create a menu, go to “Appearance” > “Menus”. This will open the Menu editor.
There select the “create a new menu” option. Title the menu set the appropriate display location, and select “Create Menu”.
Adding and Deleting Menu Items
Adding Menu Items
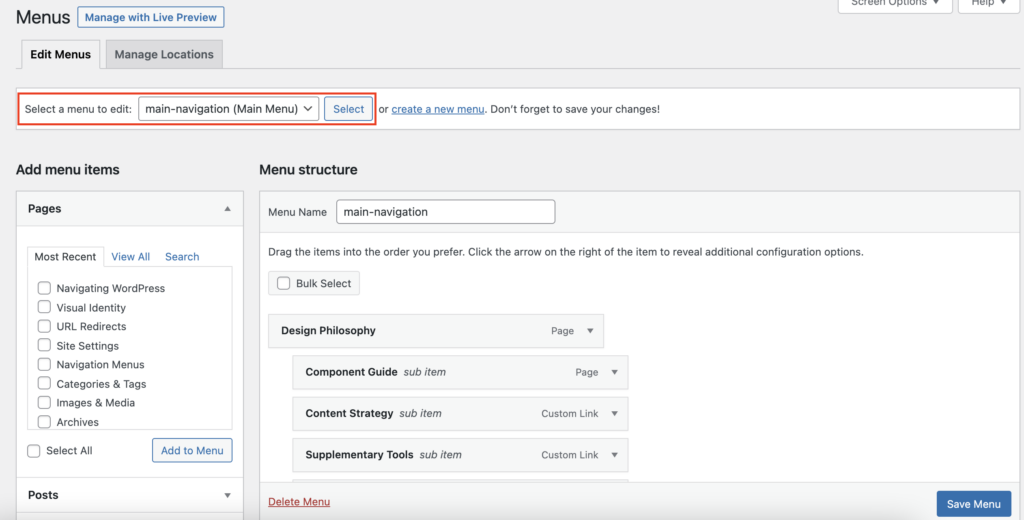
To add Menu Items go to “Appearance” > “Menus”. This will open the Menu editor. Select the menu you wish to edit by using the drop-down in the upper left-hand corner.
On the left of the Menu editor exists a list of all the Posts and Pages on the site. Select the Posts or Pages that you wish to add to the editor by checking the box to the left of the Post/Page title. Then click the “Add to Menu” button.
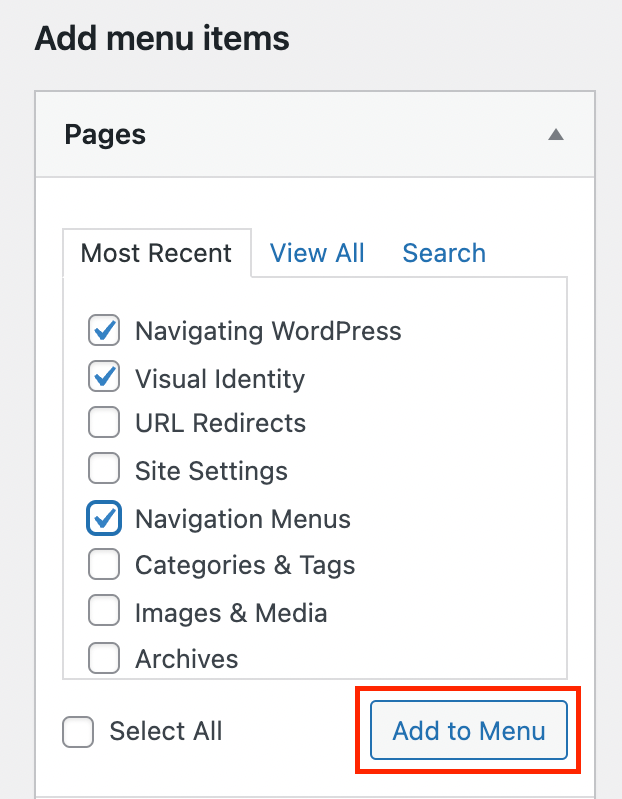
The selected Pages/Posts will appear in the Menu Structure to the right.
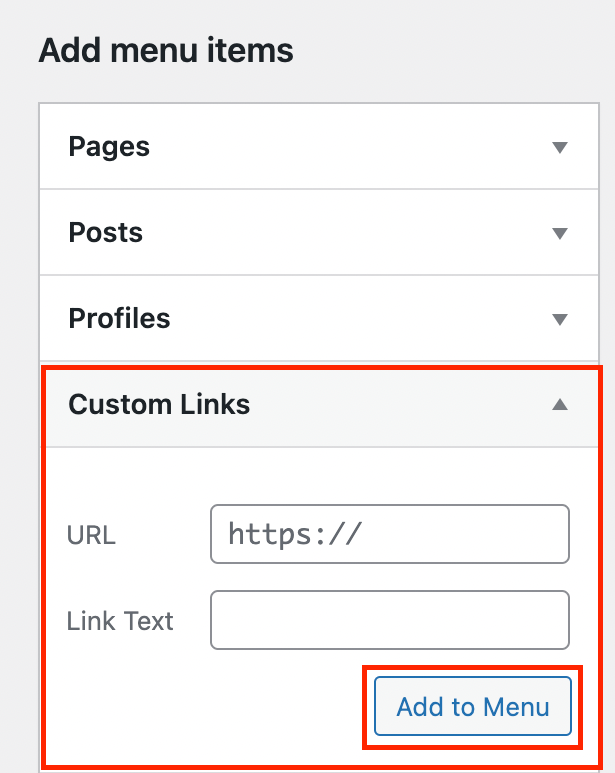
To add an external link to the menu, use the Custom Links option.
Deleting Menu Items
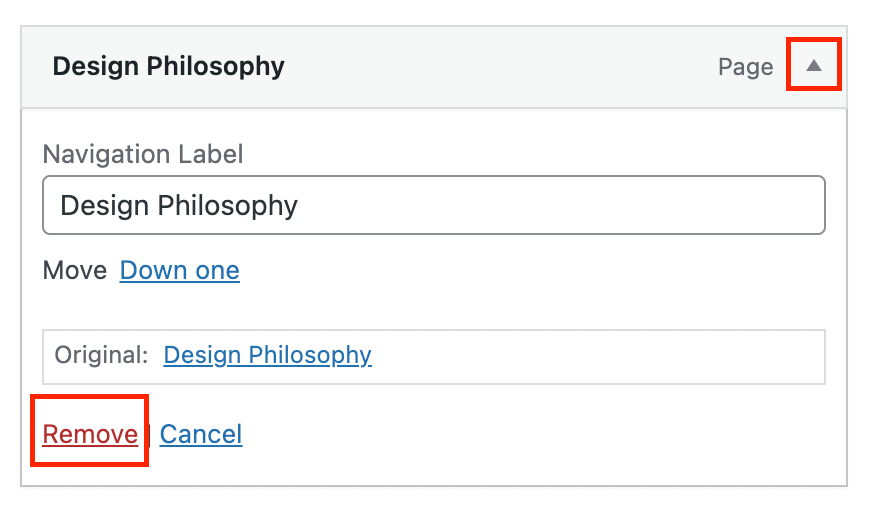
To delete a menu item, open the Menu editor. In the Menu editor, there is a section displaying the Menu items in the order they appear on your site menu. Selecting the small arrow on the right of the Menu item will open a drop-down menu.
To delete a menu item, click the red “Remove” option in the drop-down menu. This will not delete the page; it will only remove the page from the menu.
Organizing the Menu
To organize the Menu go to “Appearance” > “Menus”. This will open the Menu editor. In the Menu editor, there is a section titled “Menu Structure” displaying the Menu items in the order they appear on your site menu.
Items that are to the far left of the Menu structure are shown in the top navigation bar on the site.
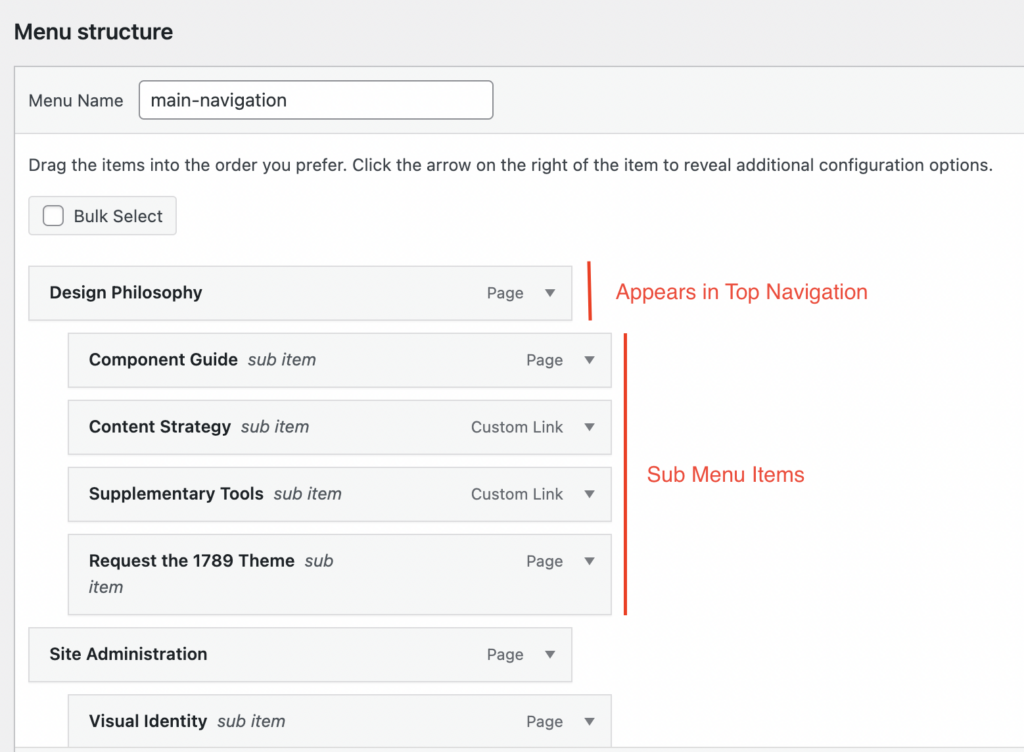
To reorder an item, click and drag the item to the desired location. Clicking and dragging the menu item to the right designates the item as part of a sub-menu.
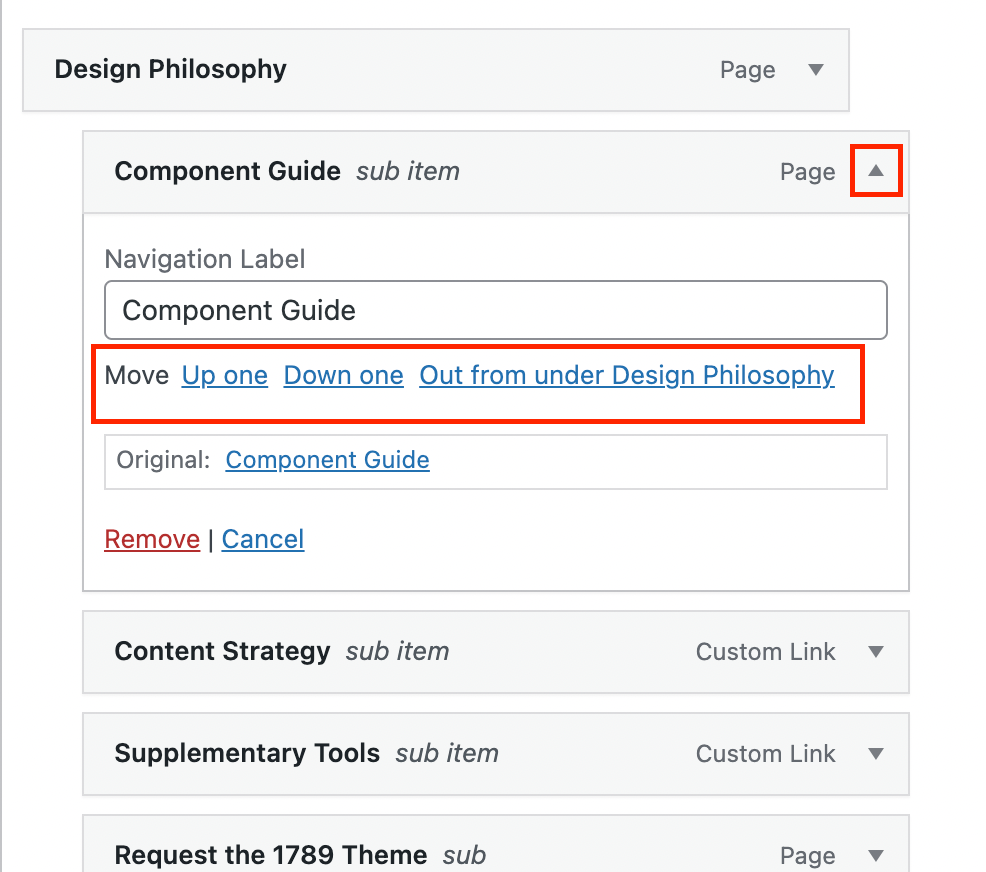
This can also be done by clicking the small arrow to the right of the Menu item. This will open a drop-down menu with options to “Move” the item.
Additional Menu Options
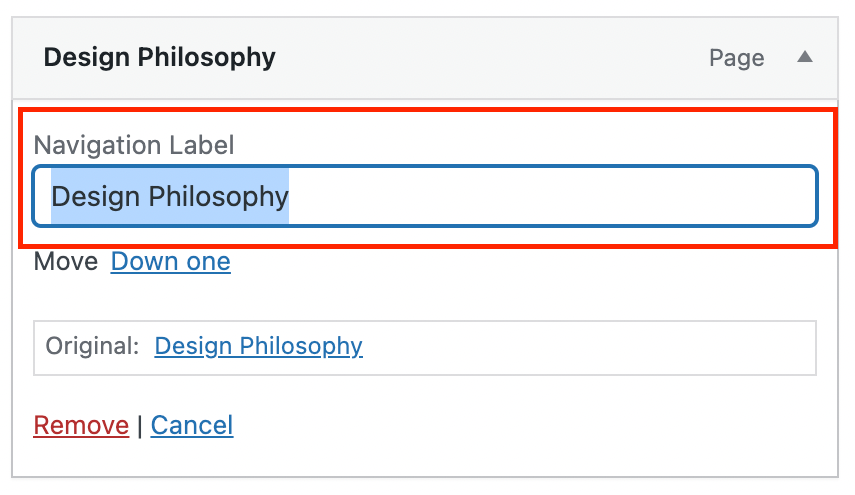
You can edit the navigation label for any menu item. To do this, in the Menu editor, select the small arrow on the right of the menu item to open a drop-down menu.
To edit the menu item text, locate the “Navigation Label” in the drop-down menu and edit the existing text. This will not change the Title of the page/post. It will only change the label of the page/post in the menu.
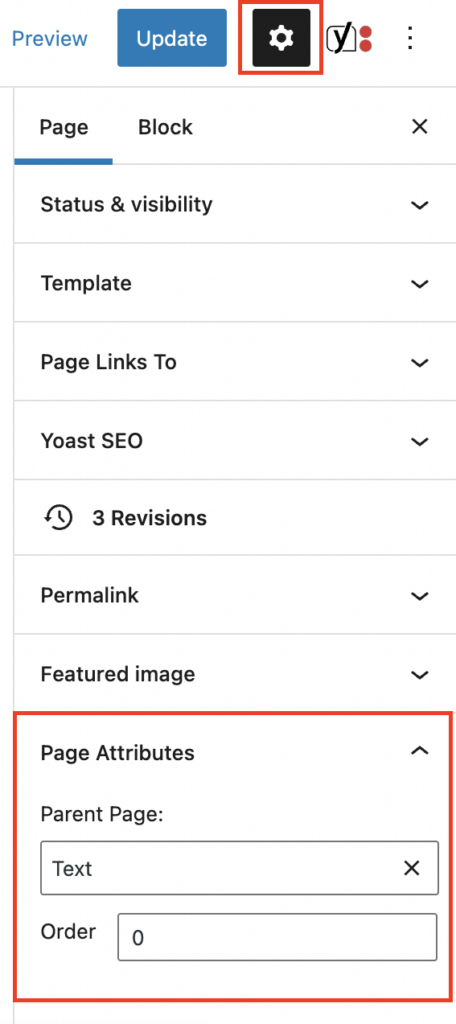
Parent Pages
Setting a parent page adds the parent page’s URL slug (as well as the preceding parent page URL slugs) to the full URL of the current page. For example, the full URL for the Headings block documentation page is https://1789-documentation.georgetown.edu/block-catalog/text/heading.
As you can see, the URL slug for the Headings page (/heading) comes last, preceded by its parent page URL slug (/text/), which is preceded by the previous parent page URL slug (/block-catalog/). Setting parent pages is not required and is not related to the menu, but it is helpful to match the parent page structure to the menu structure so users can rely on both of these options to help them understand the relationship between the pages on your site.
Parent pages can be set in the editor for a page in the Page tab of the inspector panel under the Page Attributes header.