Setting Up Google Ads Conversion Tracking with Google Tag Manager
Log in to your Google Ads account, and verify you are in Expert Mode.
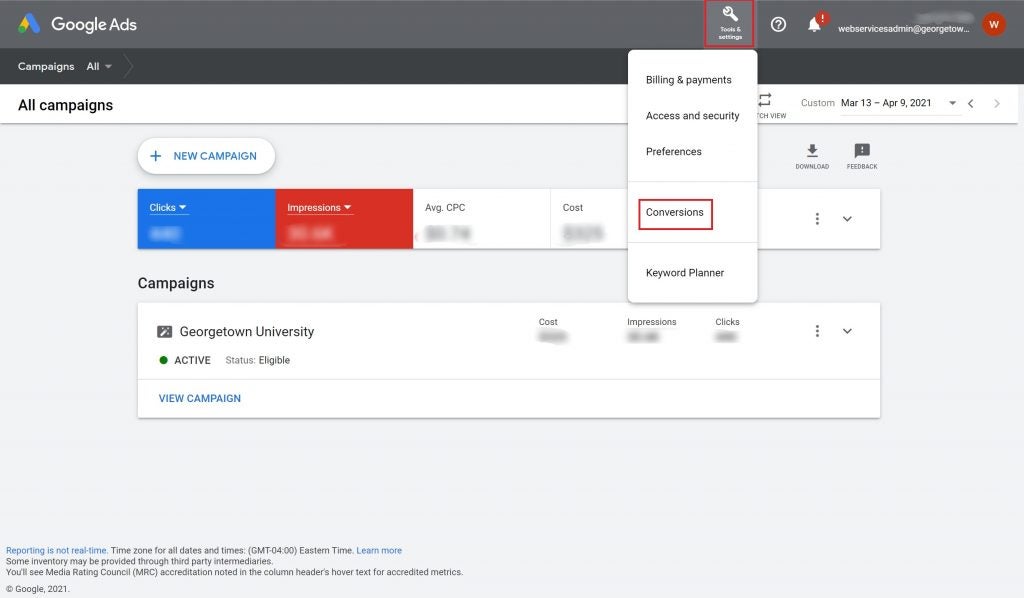
Under Tools & Settings, click Conversions.
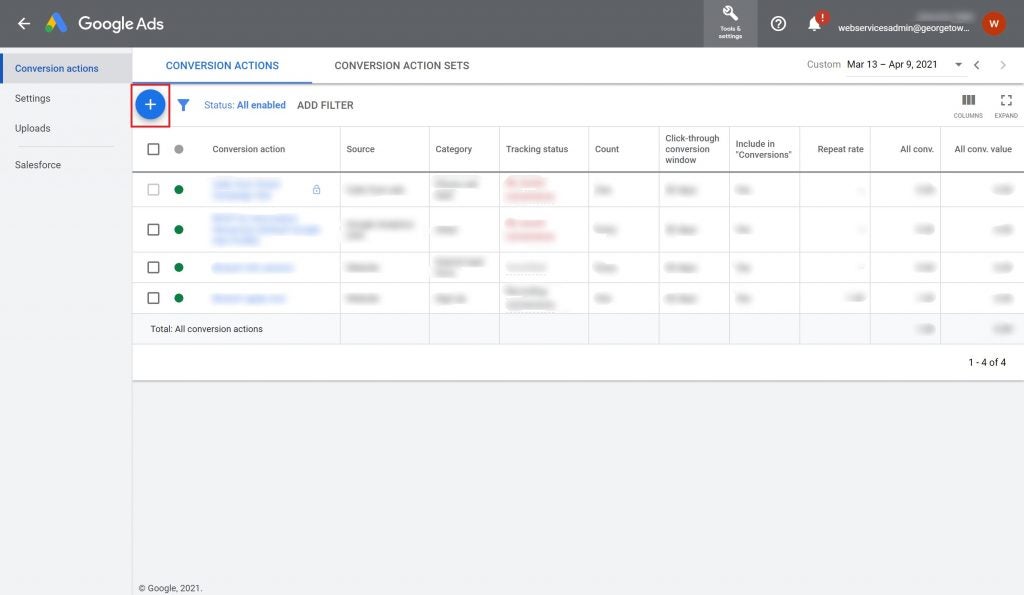
Click on the plus icon in the upper right corner. Select “Website” for the type of conversion tracking.
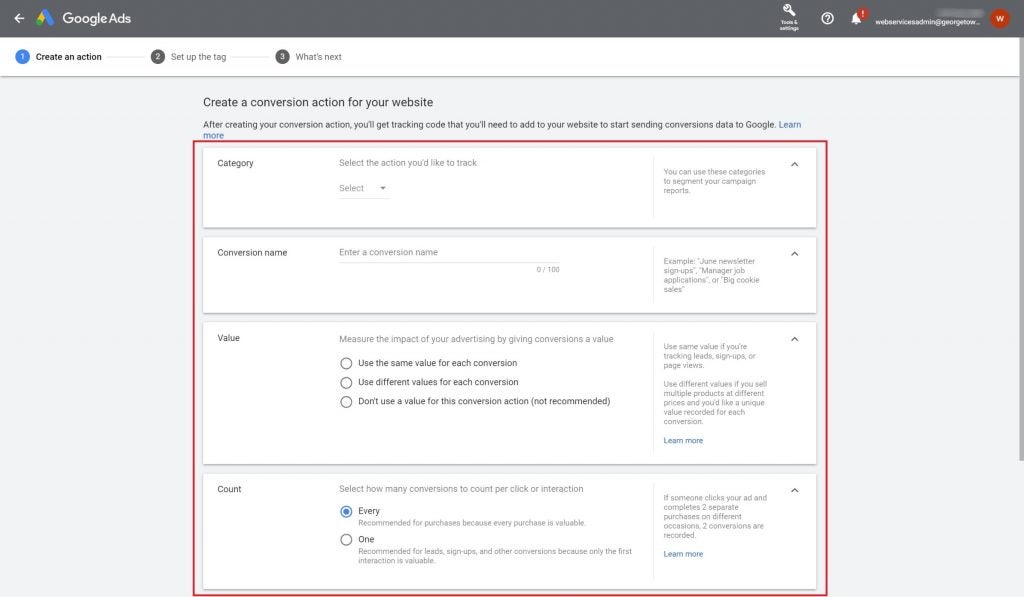
Fill out the conversion category, name, value, and count.
Category: Categories are for internal purposes and will help you segment your campaign reports. Hovering over a category option will give you a short description of the category.
Name: It’s important to be specific about your conversion name so you know exactly what it’s tracking.
Value: Adding a value can help you measure the impact of your advertising. If you’ve already calculated a specific value for your conversion, you can add a static or dynamic value for your conversion. If you want to add a non-monetary value, adjust the currency to “No currency set”. If you are unsure of the value of your conversion, select “Don’t use a value for this conversion action”.
Count: The Count setting helps Google understand how many conversions to count per click or interaction. You should choose “Every” for conversions like a purchase because every purchase is valuable. You should choose “One” for conversions such as leads or sign-ups because only the first interaction is valuable.
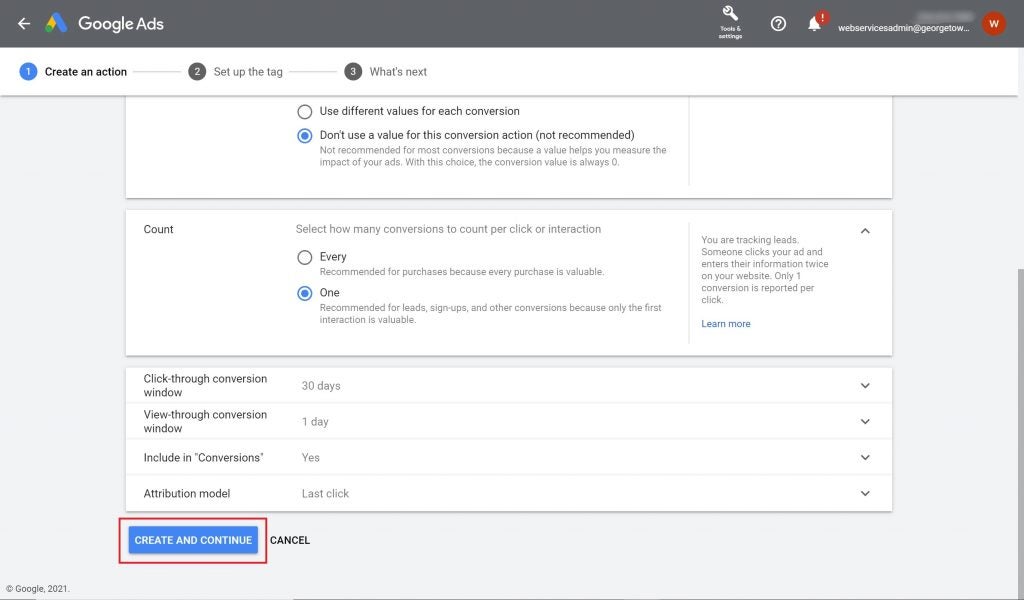
Click “Create and Continue” at the bottom left corner.
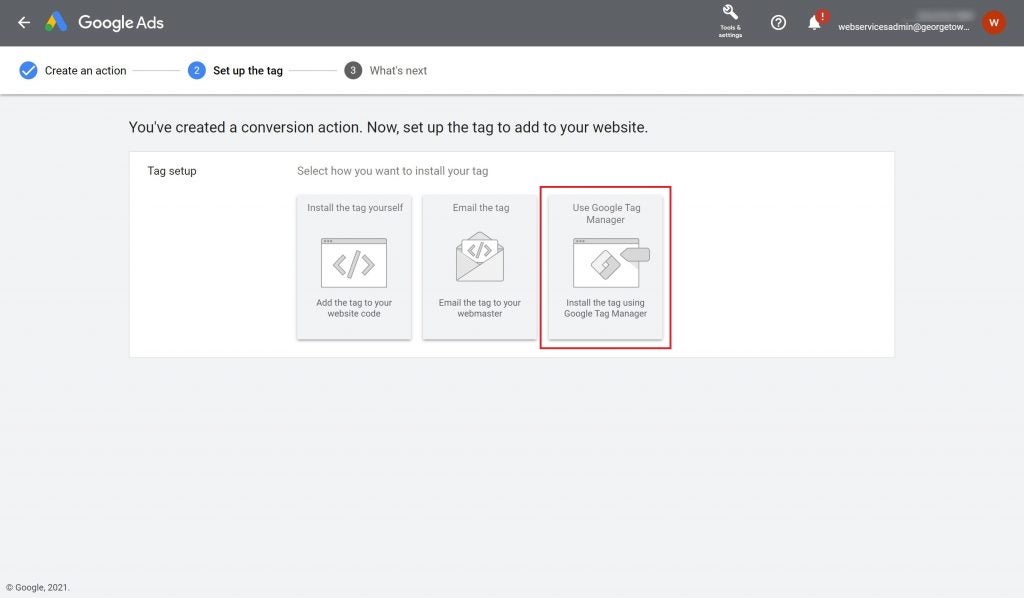
For Tag setup, select “Use Google Tag Manager”.
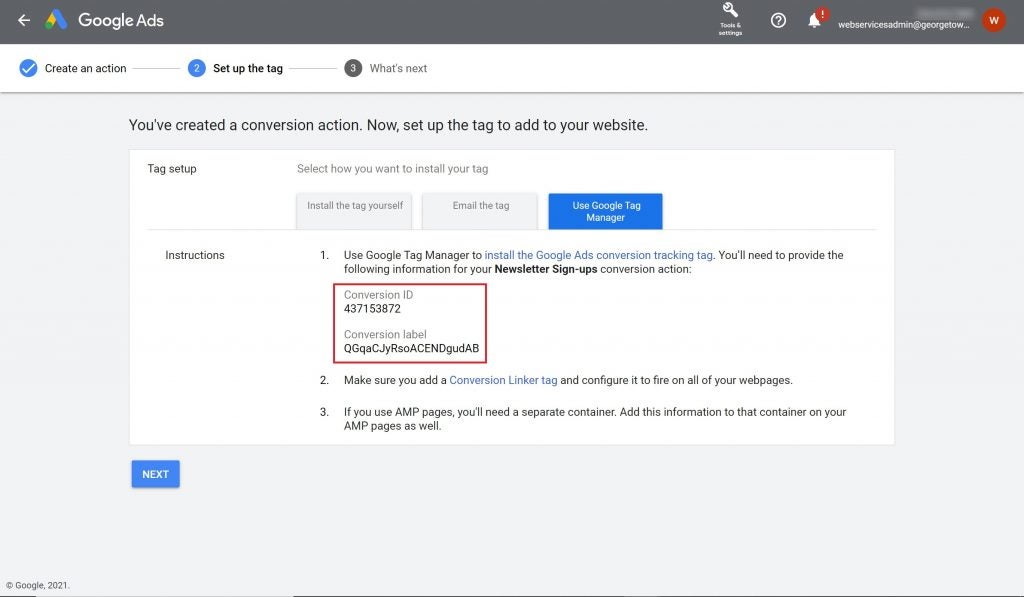
Make note of the Conversion ID and Conversion label. You’ll need these to set up your tag in Google Tag Manager.
Log into Google Tag Manager.
Click “Add a new tag”.
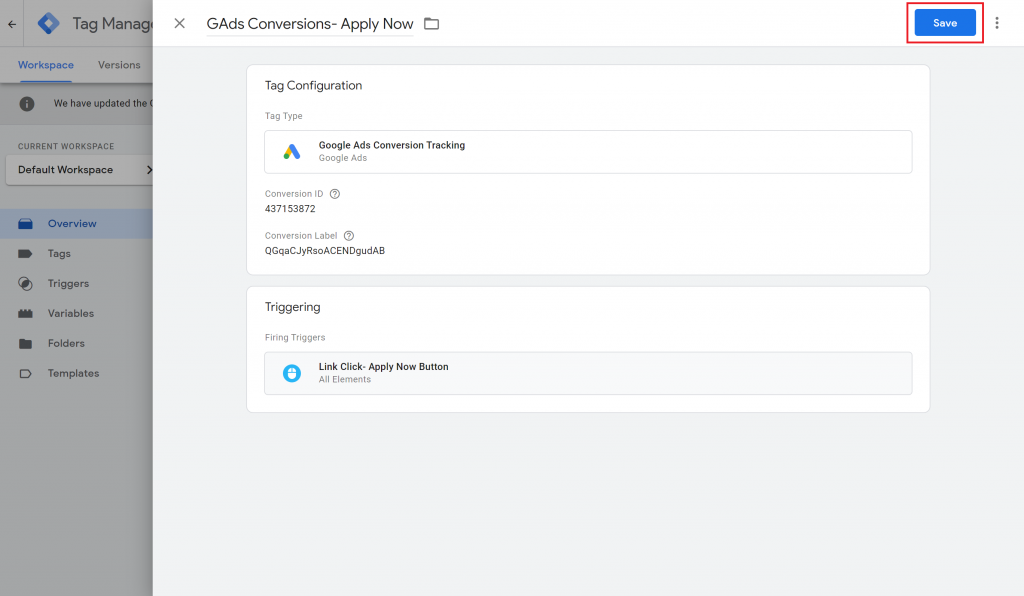
Name your tag according to your naming conventions. For Google Ads conversions, we recommend using “GAds Conversions- [short description of the tag]”
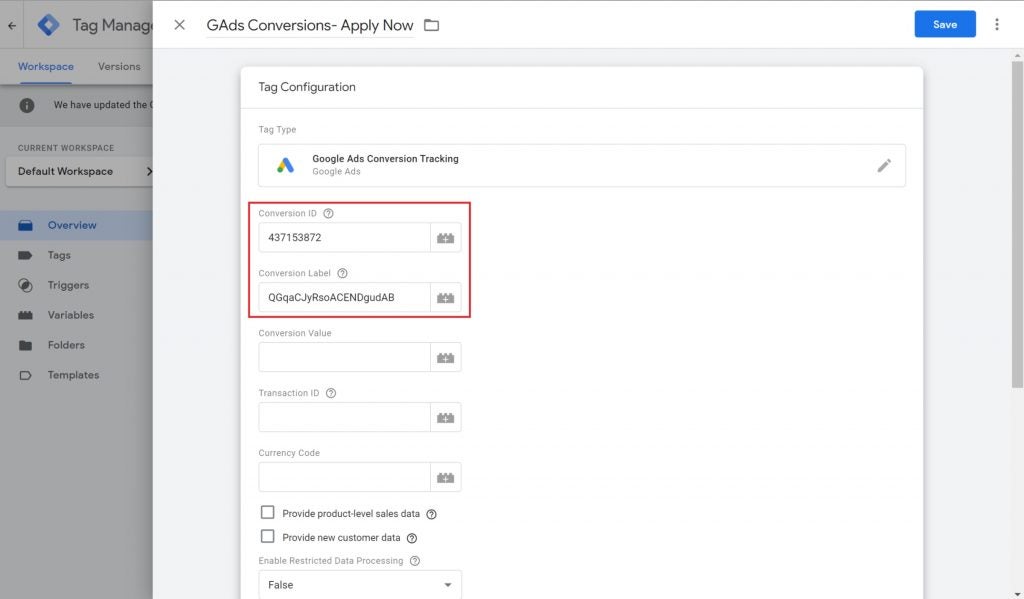
Under Tag Configuration, select “Google Ads Conversion Tracking” as your tag type.
Next, copy and paste the Conversion ID and Conversion label from Google Ads into the corresponding fields in Google Tag Manager.
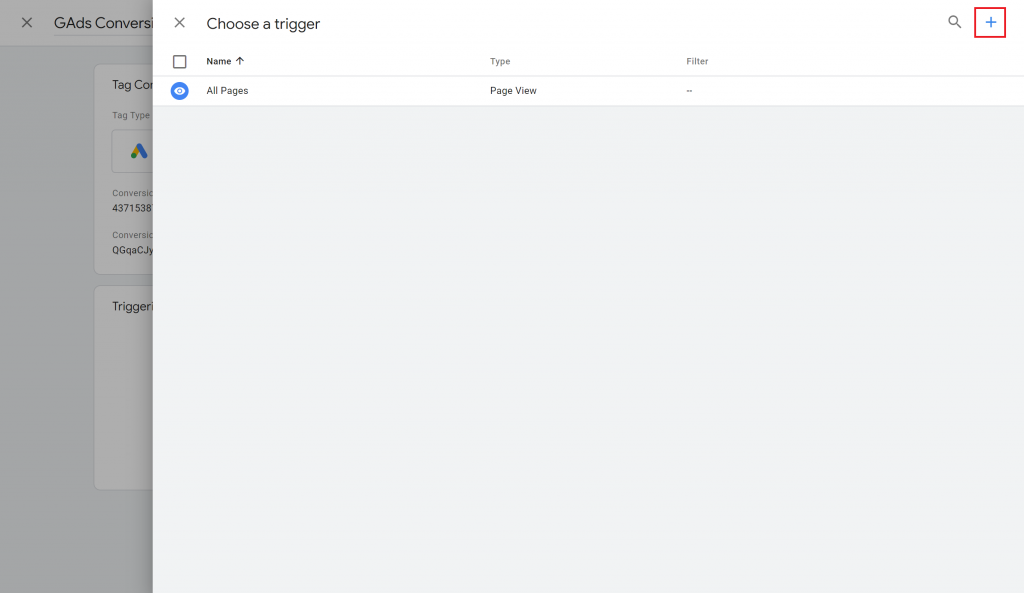
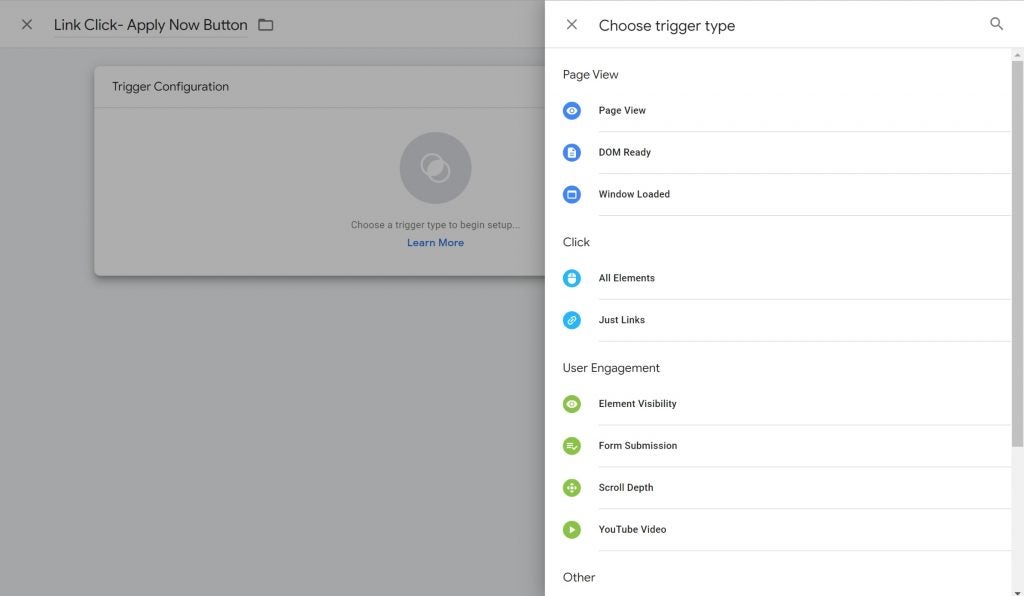
Then, add your trigger. You can select an existing trigger, or add a new trigger by clicking the plus icon in the upper right corner.
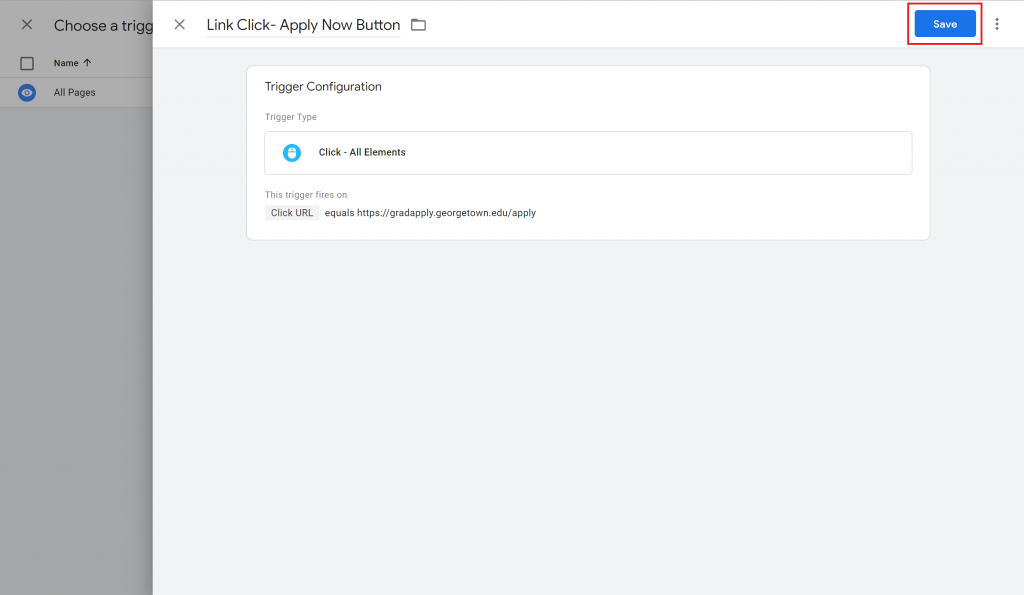
If you are adding a new trigger, name your trigger according to your naming conventions. Then, select the appropriate trigger type.
Once you have entered the conditions for your trigger, save your trigger by clicking the Save button in the upper right corner.
Next, save your tag by clicking the Save button in the upper right corner.
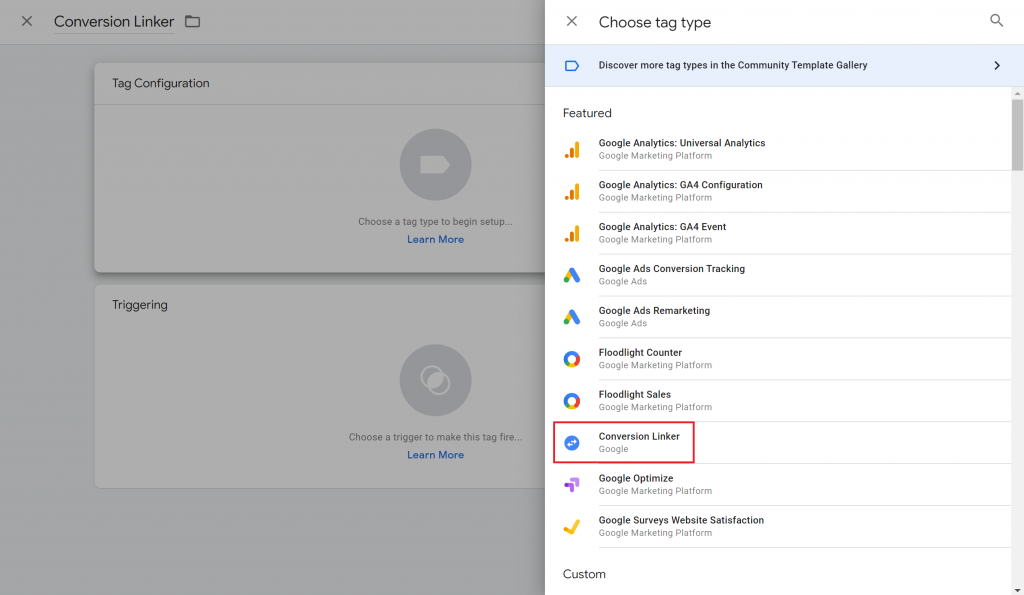
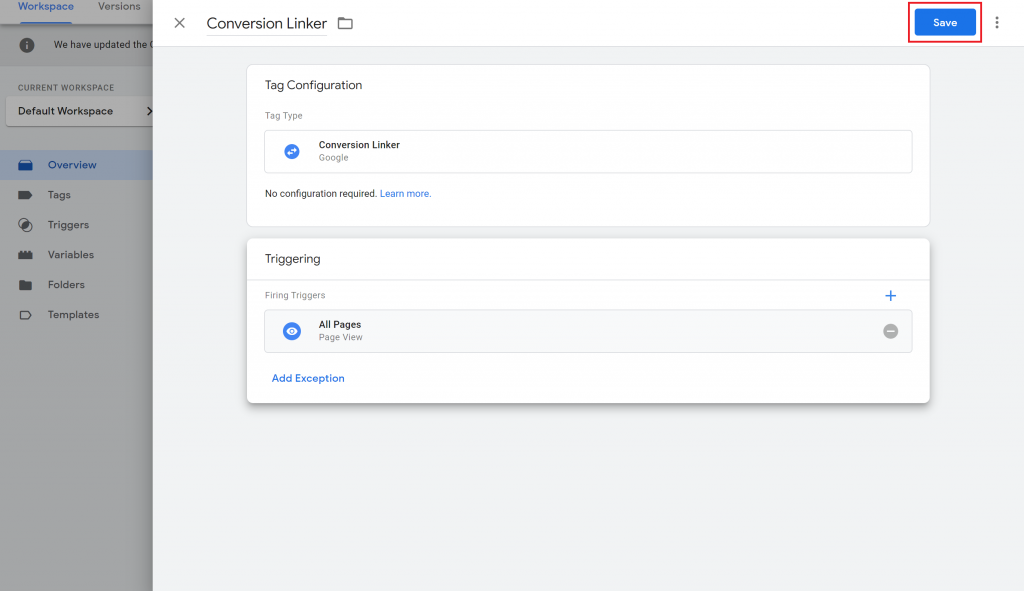
Unless you’ve linked your Google Ads account to your Google Analytics account, it’s important to add a Conversion Linker tag to ensure conversions are measured effectively. Only one Conversion Linker Tag is necessary per container. To do this, click “Add new Tag” and select “Conversion Linker” as the tag type. Name the tag “Conversion Linker”.
For the trigger, select “All Pages”. Then, save your tag.
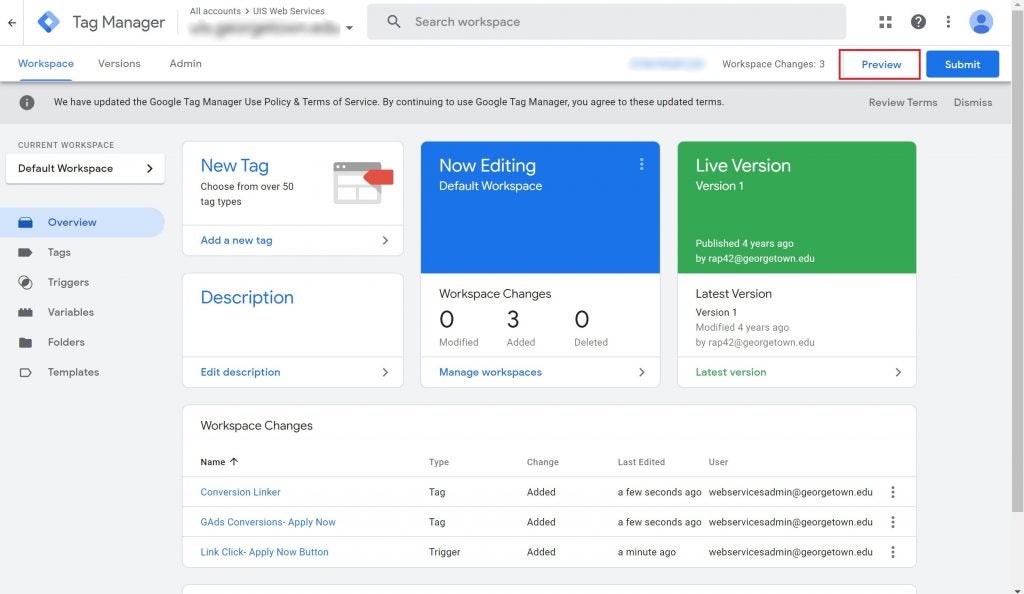
Once you have added your tags, it’s important to test them. Clicking the Preview button will open up Google’s Tag Assistant.
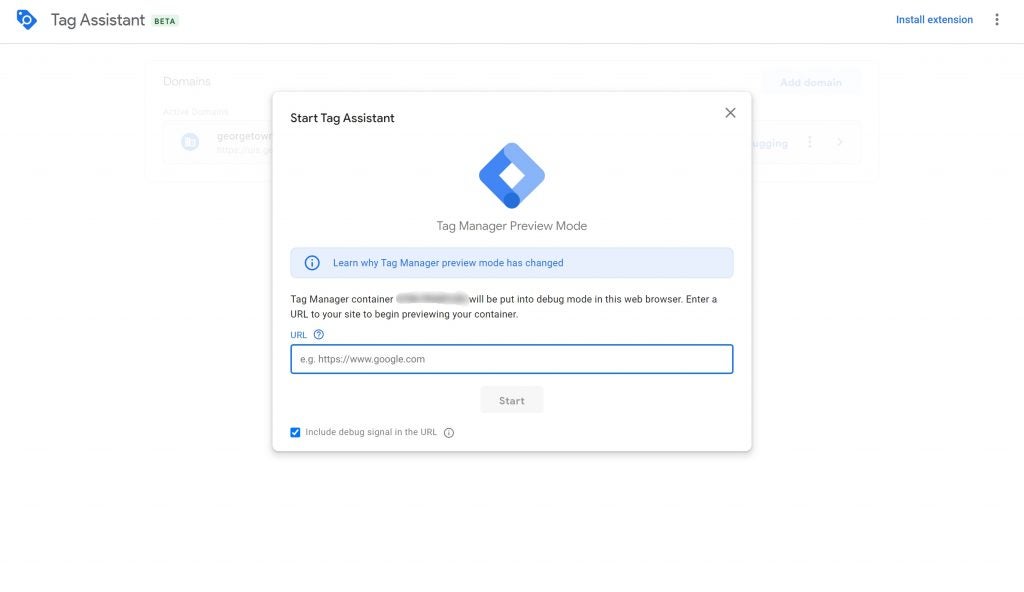
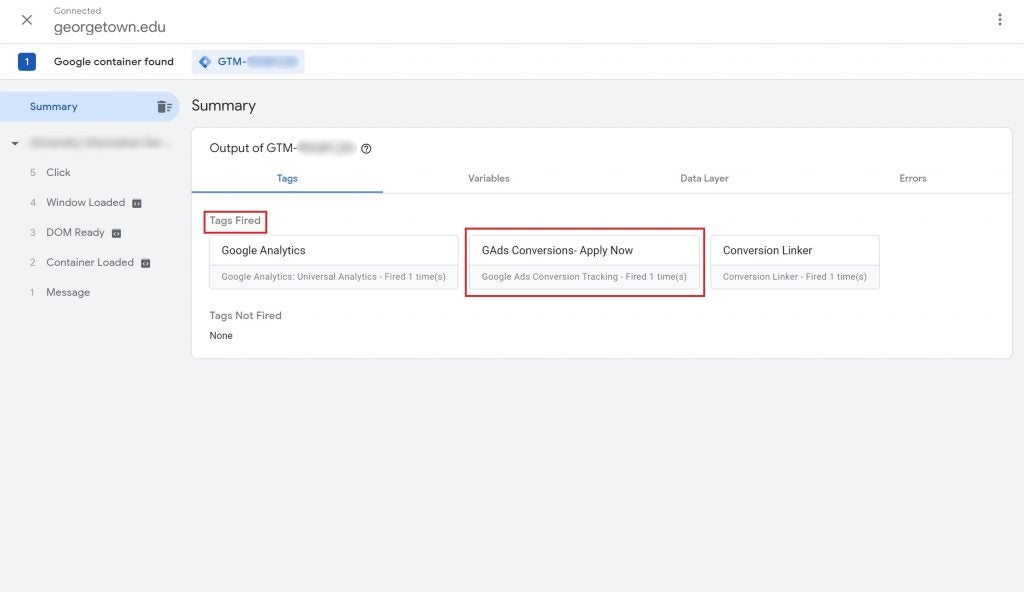
Paste your site URL and start Tag Assistant. Test to make sure your tags are firing properly by completing the action you are tracking.
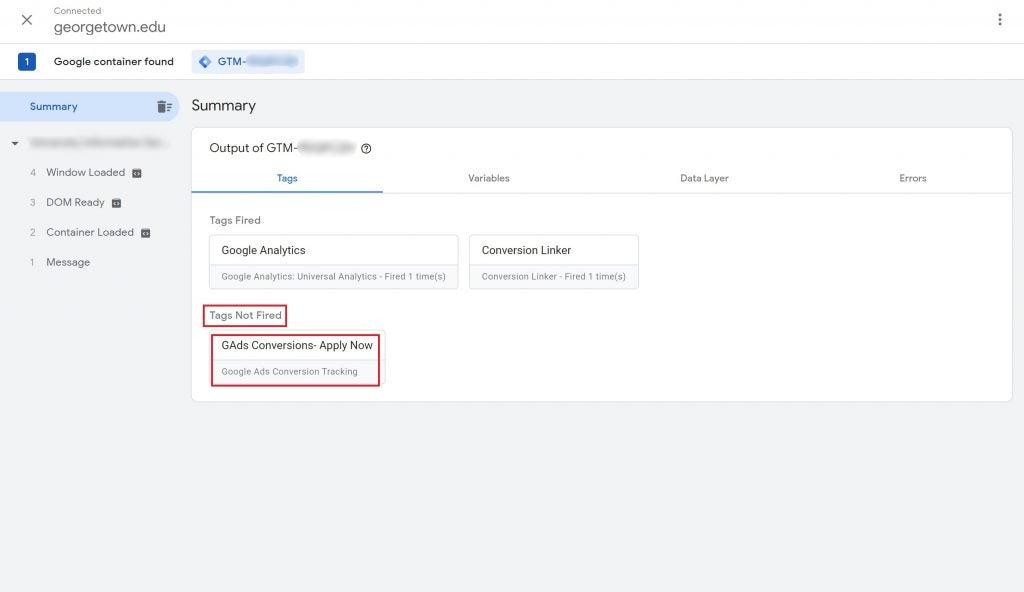
Before you’ve completed the action, you should see the tag under “Tags Not Fired”.
Once you’ve completed the action you are tracking, the appropriate tag should move under “Tags fired”. If you are having trouble getting your tags to fire, contact webservices@georgetown.edu.
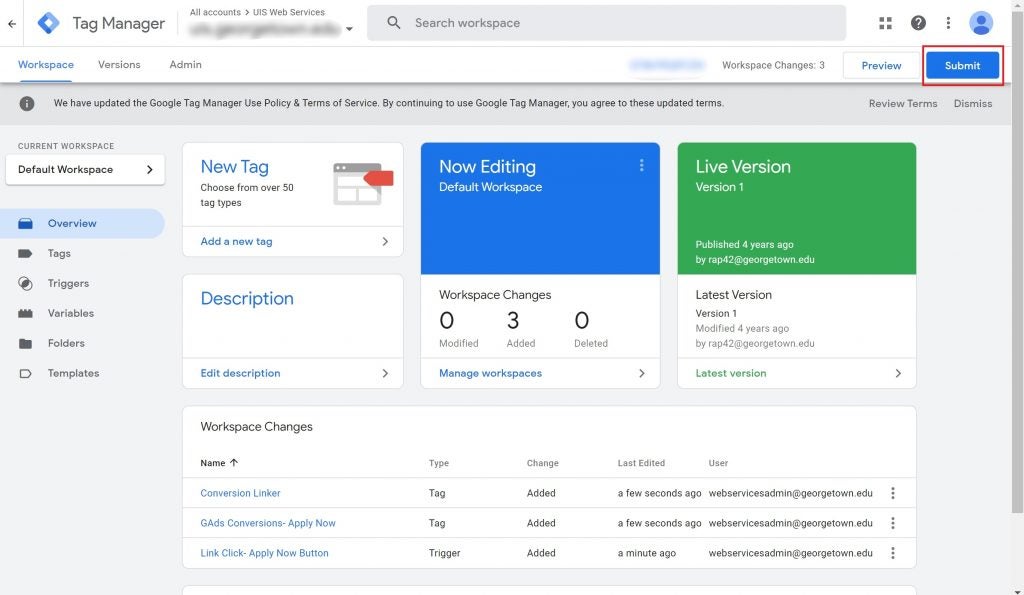
After testing your tags, submit your changes by clicking the Submit button in the upper right corner.